Viewing entries tagged
Tengku Hana Shafikah

New 3D Model • Piyo Piccimori v2.0

New 3D Model • Piyo Piccimori v2.0

Greetings, everyone! This is my new 3D model, Piyo Piccimori v2.0. Enjoy! See all versions of the Piyo Piccimori model here


I am elated to announce that this model has been a large improvement for Piyo Piccimori! Now that Piyo's latest model has a favorable number of polygons and shapekeys, it is much easier for me to animate him with a more convenient workflow. 

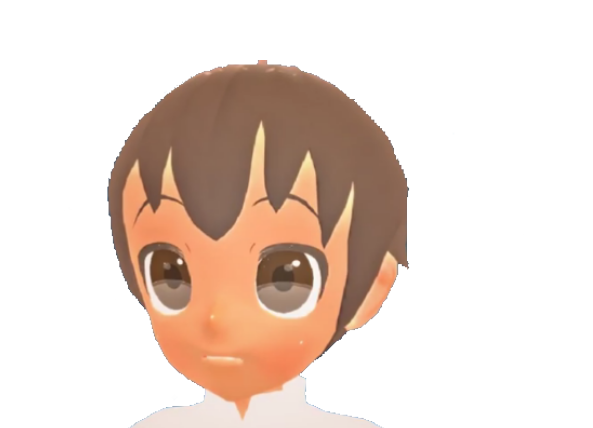
For those who have seen Piyo Piccimori v1.0, you may notice that Piyo appears more mature in his v2.0 state. This was done intentionally, because I needed him to be at an age of at least 5 years older than the original age (for the purposes of an upcoming game). His hair parting is quite distinctive as well, but not as contrasting as the modification of clothes. 

Now that it is summertime in the Northern Hemisphere, I am able to dedicate by time to the creation of my upcoming game. More posts on the game will be uploaded soon. Thank you very much for reading! 

New 3D Model • Aquadew v1.0

New 3D Model • Aquadew v1.0

Greetings! Here is the preview video of my latest 3D model, Aquadew v1.0. Enjoy! See the entire 3D Character Model Showcase. See the entire 3D Character Model Showcase on YouTube


Good day, everyone! I'd like to write a short blog post about the making of Aquadew v1.0, so that I could share a few modelling methods that I executed on this particular model. This is the first model of Aquadew--which was originally a character that I created when I was twelve. The model design was based on the 2012 drawing I did of her. I then updated her design my changing her color palette, her clothing and her overall appearance.

MODELING PROCESS

The Beginning: After  drawing Aquadew facing front and facing left, I used the image as a guideline to model her body and face. When I was modeling her, I didn't extrude vertices to create lines, and then create faces from connecting those vertices. Instead, I started with the good ol' cube, subdivided it, and edited it accordingly. One drawback about this method, however, is that the model would most likely end up being too high in polygons. 

Hair: I also adapted a new style of modeling the hair! I wanted to make the model look more "anime-like," so I made the hair segments thicker and made them shaped like cresents. I like to keep my models' hairstyles short for now, because I'm still trying to figure out how I can properly model long hair. 

Rigging: I once again used Rigify and the Armature Modifiers to rig Aquadew. Gladly, most things went well! The skirt was properly rigged according to the leg movement, and the body did not have many deformed weights. 

Shapekeys: The good news is that I was able to apply the Mirror modifier to my model at the right time, so that I could create facial shapekeys faster. This is because both halves of my model's body is symmetrical, so mirroring shapekeys made the process quicker.


I hope you enjoyed reading this blog post! Thank you!


New 3D Model • Strawberry Lemonade vX

New 3D Model • Strawberry Lemonade vX

Greetings! Here is a short preview of my new 3D model: Strawberry Lemonade vX. Enjoy! This model is an update for Strawberry Lemonade v1.0


This has been a huge update for Strawberry Lemonade, since she's been through so many experiments before the final product! In this post, I wanted share a few Blender experiments that I performed with Strawberry during the process. Enjoy! 

Experiment 1 - One Interconnected Mesh

As an experiment, I decided to make her body mesh and clothing attached as one, interconnected object. This was to make rigging easier and less time-consuming. This method was significantly helpful when using Rigify's rigging add-on in Blender, because I noticed that Rigify couldn't recognize overlapping objects or meshes. One example was trying to rig her legs and her skirt. This method, however, may not always work: despite the legs being a whole mesh with the skirt, Rigify only rigged the legs but not the skirt. The only way for me to solve this problem is to manually weight the legs with the skirt or use the Armature Modifier. This brings me to my next experiment...

EXPERIMENT 2 - Armature Modifier

The Armature Modifier was a life saver! This method is extremely useful when you have hair, face features and clothing as separate objects and meshes. First, I rig my body mesh (which includes the head, arms, legs, torso and clothing) by applying automatic weights from my meta-rig to my mesh. Then, I apply the Armature Modifier to separate objects that were not rigged yet (such as the hair, face features and accessories). Then, in weight paint mode, I would apply the appropriate weight to the vertices of the mesh. 

EXPERIMENT 3 - Hair Shapekeys

There are moments where applying physics to certain objects can be unnecessary. Strawberry has short polygon hair, so physics "bodies" are not necessary in this case. In addition, using physics would definitely take up most of my RAM, thus, slowing down my laptop. Instead, I create shape keys for hair. This method may make animating a little bit more tedious, since you need to manually create key frames whenever animating the hair. Using this method really depends on whether you would or wouldn't mind sacrificing your time manually animating hair. I think this method would only be best for those who made characters with low poly hair, lacks a nVidia graphics card (only applied to new versions of Blender). Since I use a laptop with a built in AMD graphics card, I can't change the graphics card to instruct Blender to use GPU instead of CPU. 


I hope these methods and obeservations were usful to everyone! Thanks for reading, and happy modeling! 

New 3D Model • Affendi v2.0

New 3D Model • Affendi v2.0

Greetings, everyone! I have attached a short video compilation for the preview of my new 3D model: Affendi v2.0. The model was modelled, textured and rendered in Blender. See Affendi v2.0 here.


Some of the main purposes of making of this model was to use it for game cut scenes and character busts in my upcoming game, Paperclip. The game was originally named Until We Meet Again (short gameplay can be seen here), but I left its demo unreleased, and decided to make a fresh new game. 

It's been a huge update for Affendi, so I'm currently also working on Ana's v2.0 as well! Here's a small gallery of references I used for the making of Affendi:

I'm hoping to finish Ana's model so that I am able to start rendering some environment shots and character busts for the new game. Thanks for reading!

New 3D Model • Piyo Piccimori v1.0

New 3D Model • Piyo Piccimori v1.0

Greetings! Above, I have attached a short video compilation on my new 3D model, Piyo Piccimori v1.0. The model was modeled, textured and rendered in Blender. See the preview for Piyo Piccimori v1.0 here.


I originally modeled Piyo as a third player model for a game I'm currently developing, but the result ended up being more high-poly than expected! It was also difficult trying to import my model to my game engine due to the large amount of materials and textures.

I eventually decided to use him as a model for animations or video cut scenes in the game. I mainly used diffuse shading, because it hides any jagged edges when using shapekeys, and it gives him a clean, simple look. 

At the moment, I'm trying to work on a second model of Piyo Piccimori (him at an older age) for an upcoming animation project--and this model's going to be slightly simpler!